AAVAA User Guide

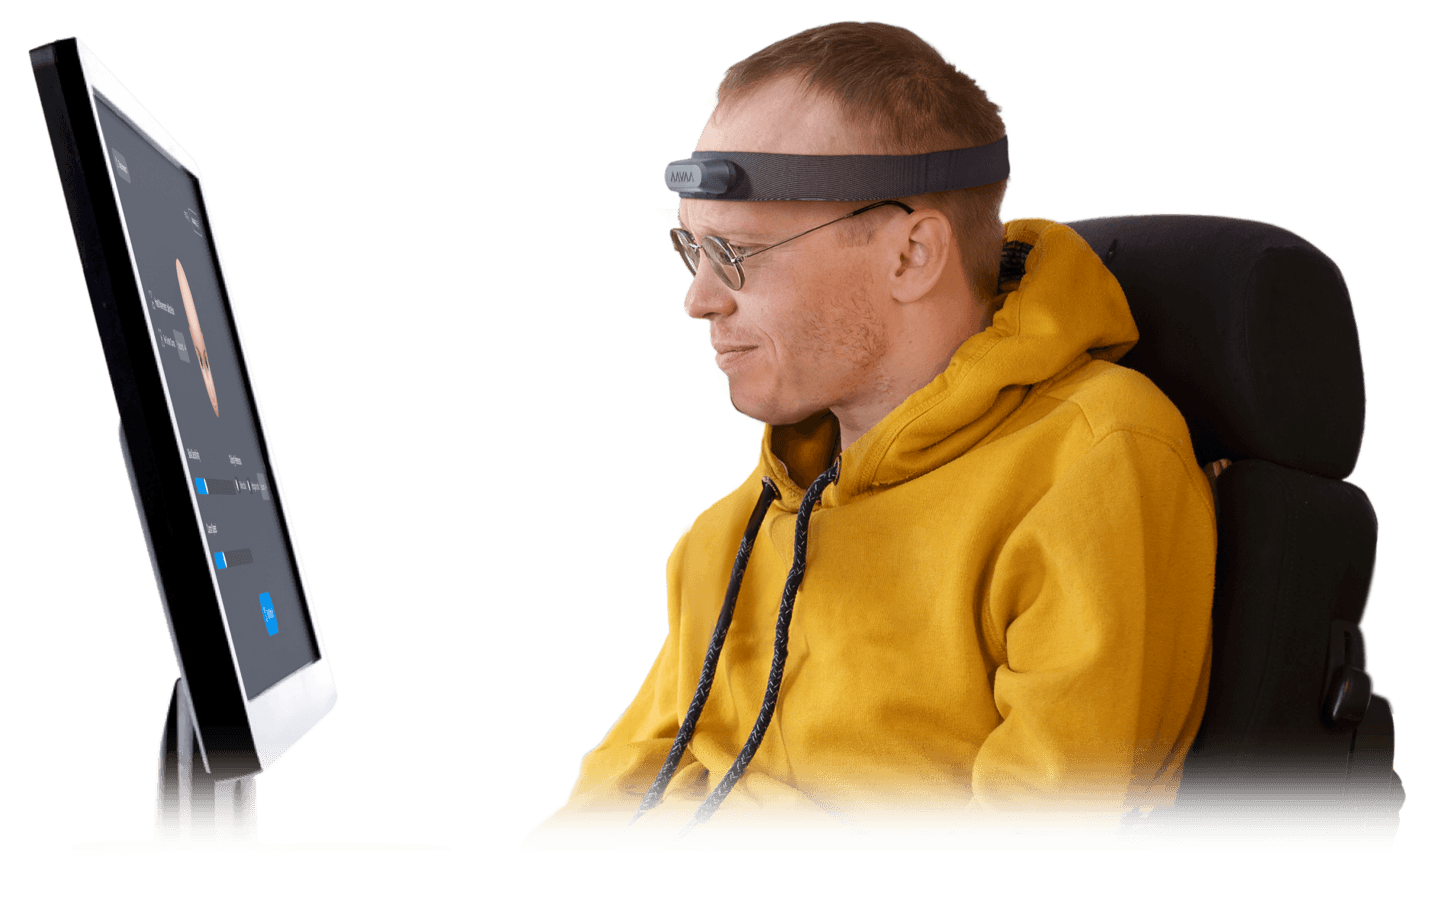
Device Set-up
You can use the AAVAA Software to adjust the blink sensitivity, head movement speed, clicking preferences, and troubleshoot your device. Access our tool to customize your AAVAA device settings to your specific needs, improving comfort and efficiency.
Download the App
Download the Software file for Windows or MacOS and install it on your computer from the downloads folder (See more versions on the Download Page).
Pair your device
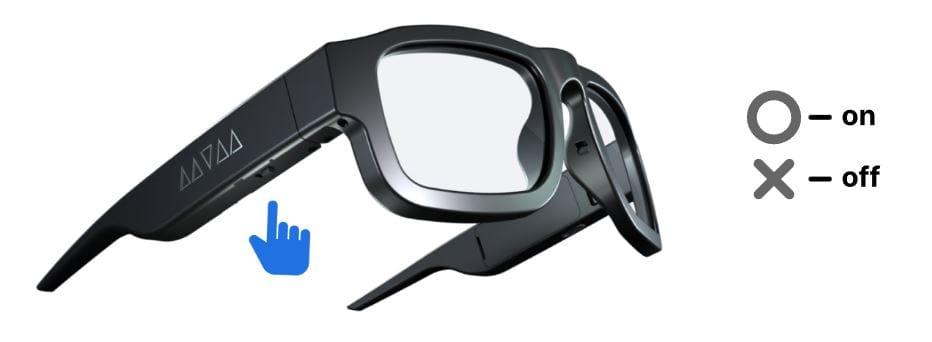
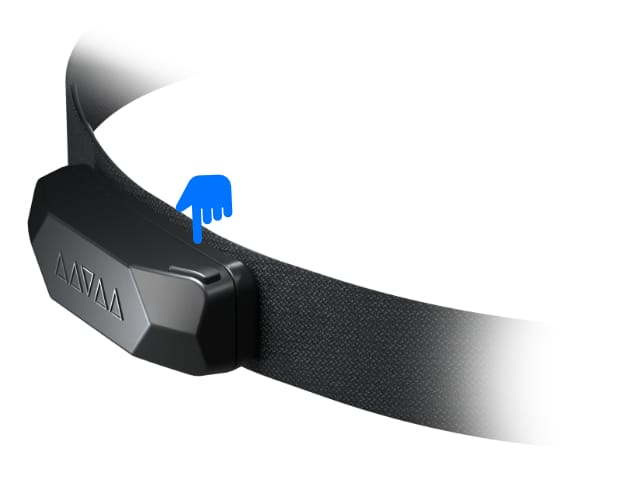
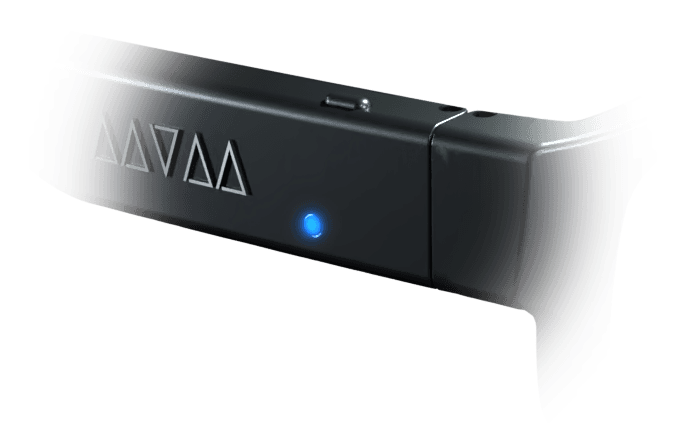
To turn on your AAVAA Device, switch the button at the bottom of the device.
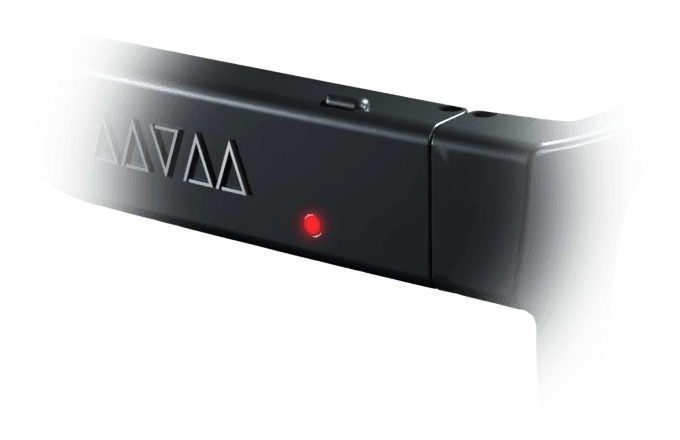
When charging the light on your device will turn Red. The light will turn Blue after the battery is charged.
Charging in process
Charge complete
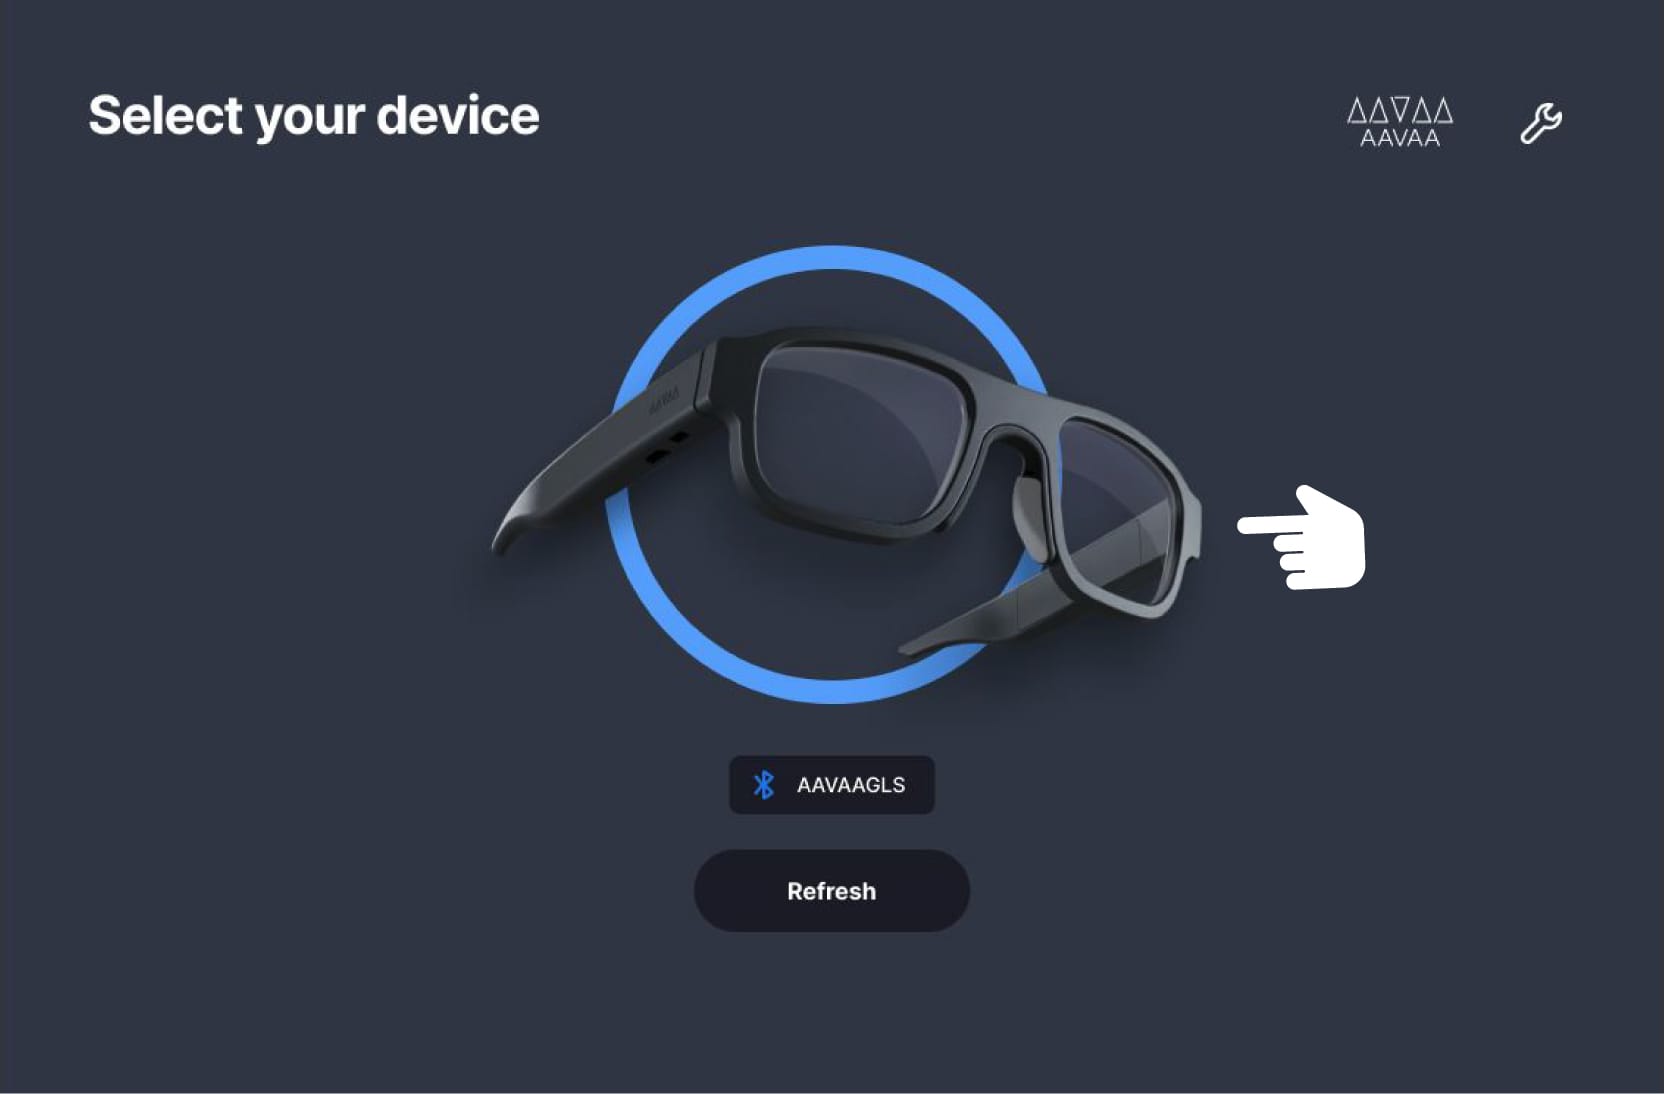
Open the AAVAA App
Open up the Mini-Gui and select your AAVAA device from the list of available devices. If your device does not appear on the list of available devices, refresh the list by clicking on the “refresh” button.
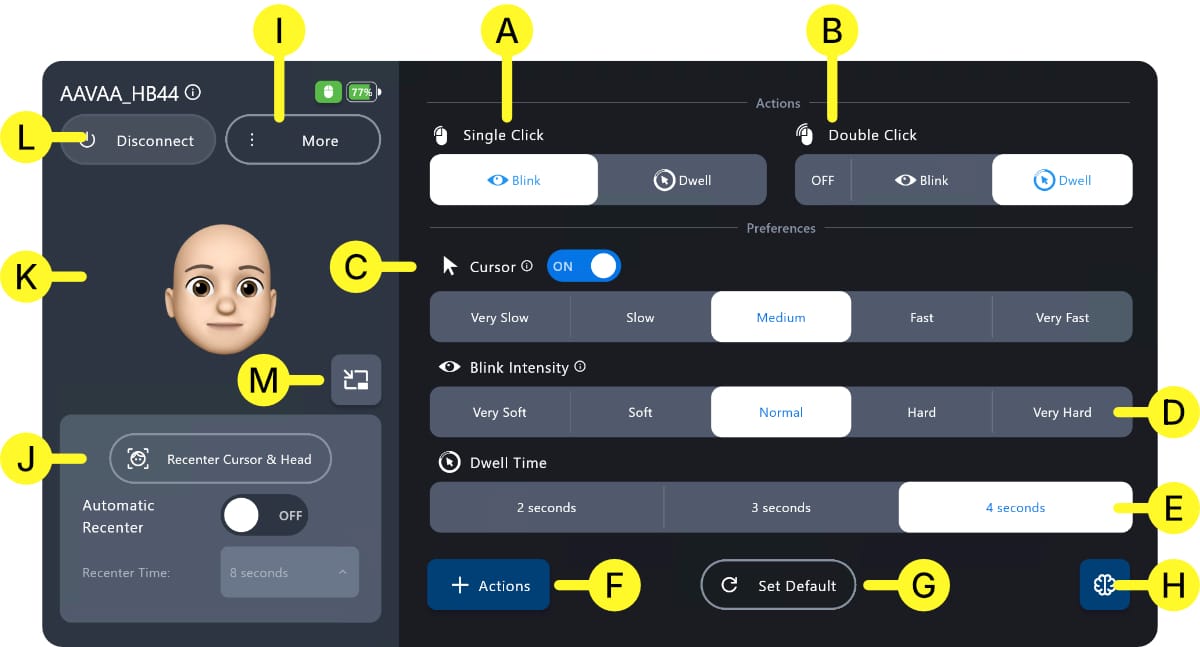
Options & Features
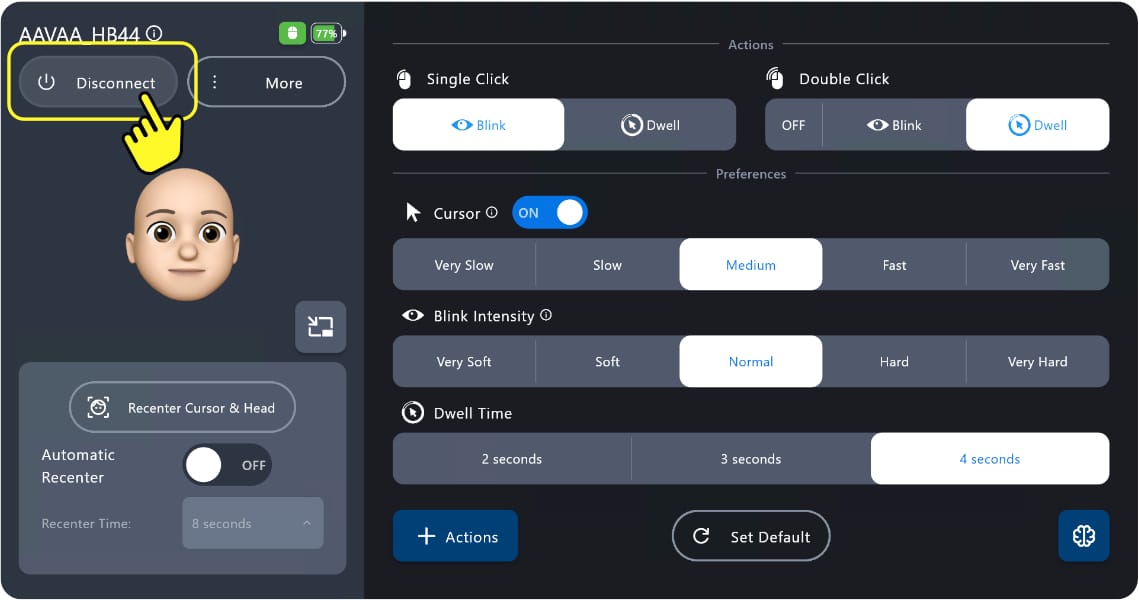
Change the device settings of your AAVAA Device.
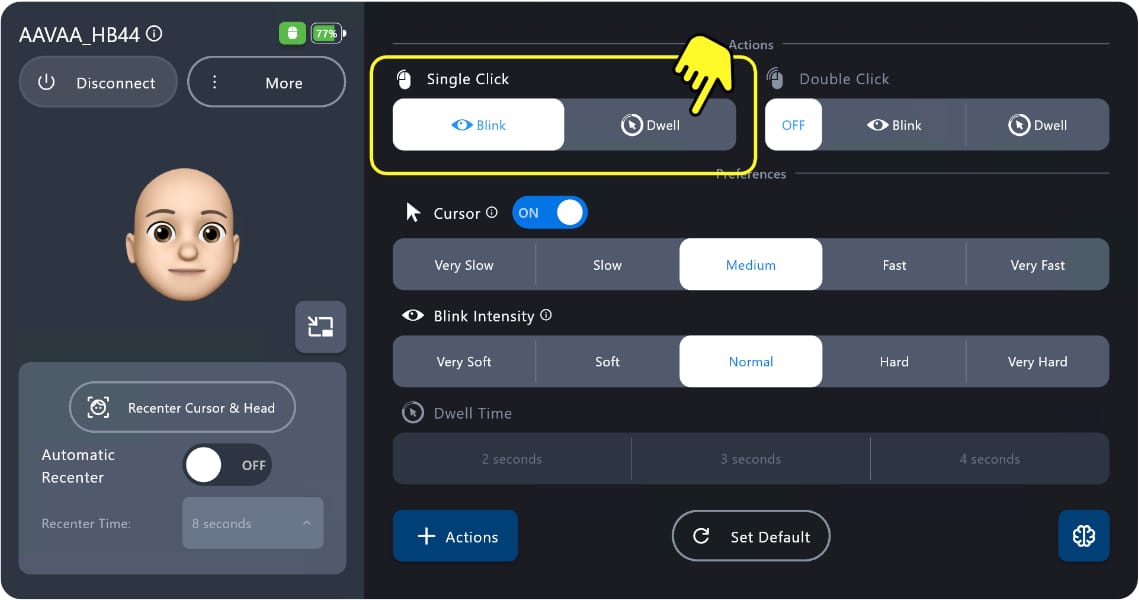
Single Click
Single Click is always enabled and you can choose between Blinking or Dwelling to single click. (See more about Dwell function)
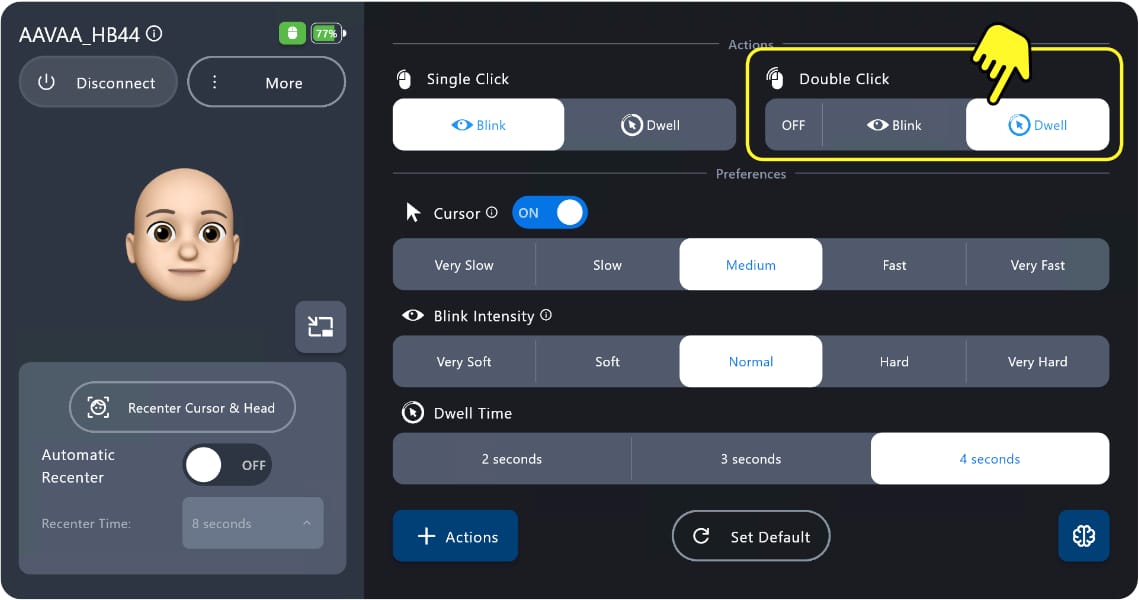
Double Click
Turn on Double Click by choosing between Bink or Dwell to double click. (See more about Dwell function)
Dwell Time
The Dwell function enables you to select and click on the screen without blinking, all you need to do is hold your gaze and dwell on your selection to click. You can select the amount of time it takes to trigger.
Dwell is available for single click or double click.

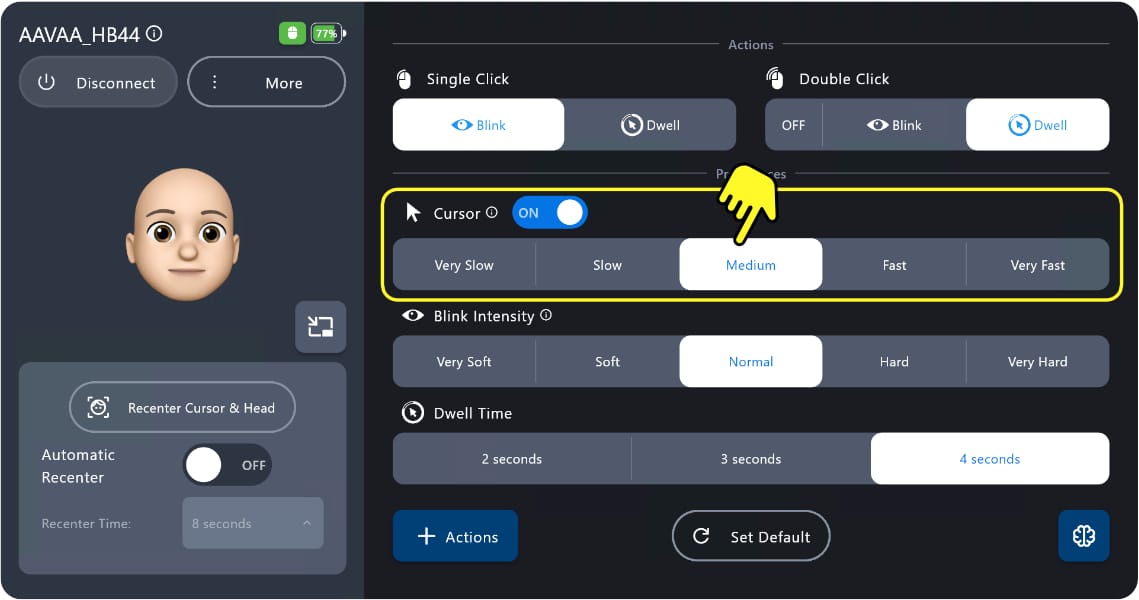
Cursor Speed
To customize the speed of your Head-Mouse, use the Cursor Speed setting. This setting allows you to fine-tune the sensitivity level according to your preference from Very Slow to Very Fast.
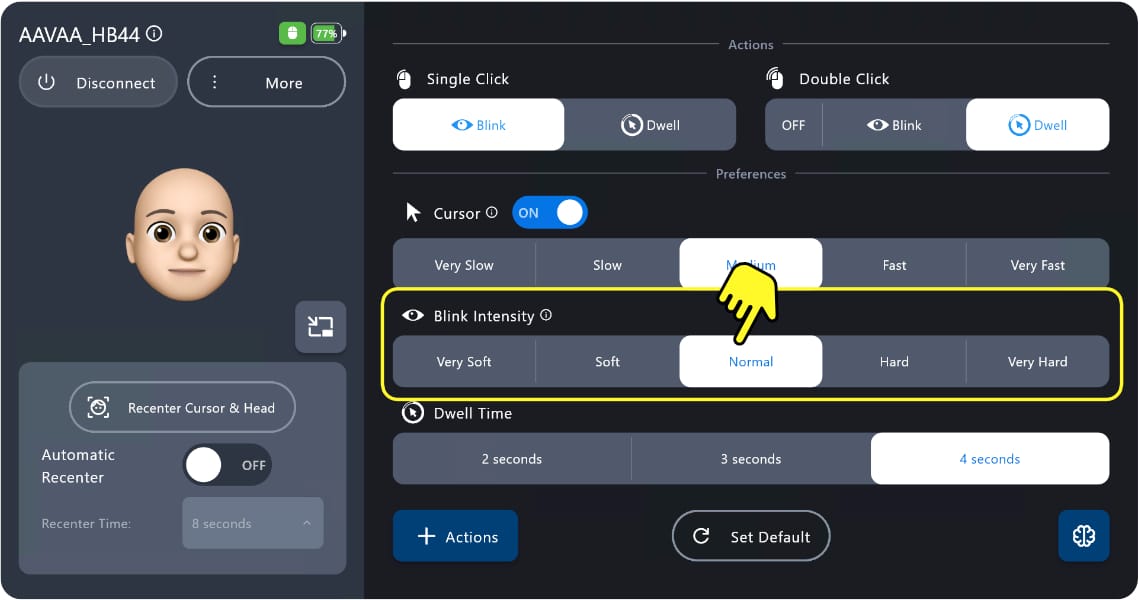
Blink Intensity
To customize blink responsiveness, use the Blink Intensity setting. Adjust the sensitivity level from Very Soft to Very Hard until it feels comfortable and intuitive for your usage.
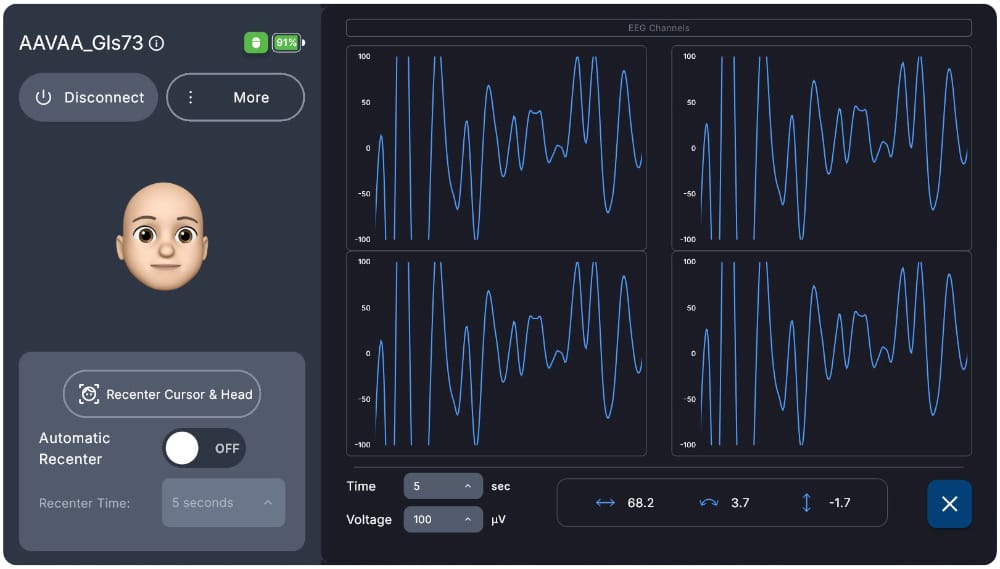
Bio-Sensor Data
Track your brain activity in real time with EEG data visualization. Great for monitoring performance and device response.
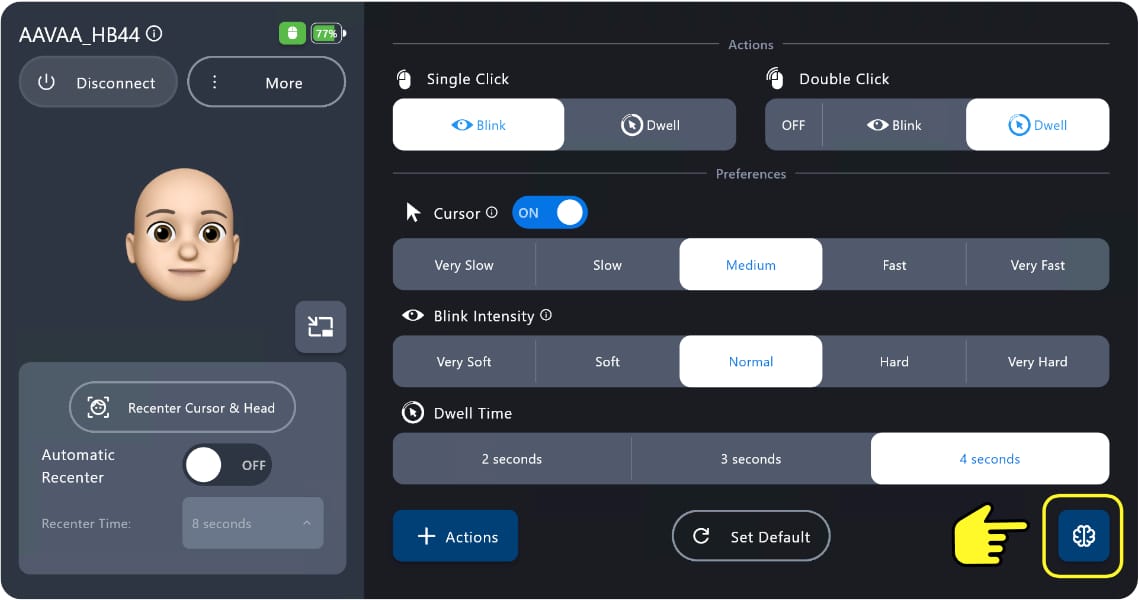
A section will appear showing the EEG data graphs for each of your device’s sensor.
Recenter Cursor
The Recenter Cursor option allows you to realign the cursor with your head position. It is often the case that the cursor does not match your head position, and this setting helps ensure accurate tracking and alignment.
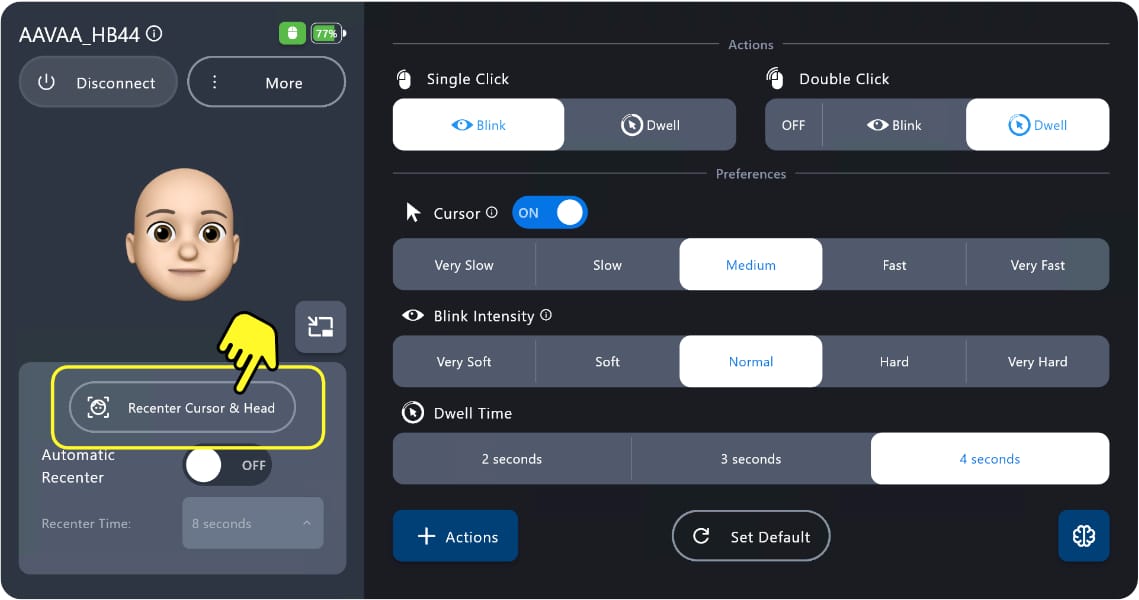
If you notice the cursor is not aligned with your head position, follow these steps to recenter it:
1. Position your head straight and centered with your screen.
2. Using a different clicking device (Such as a mouse), click on the “Re-Center Cursor” button.
3. The cursor will automatically position itself at the center of the screen.
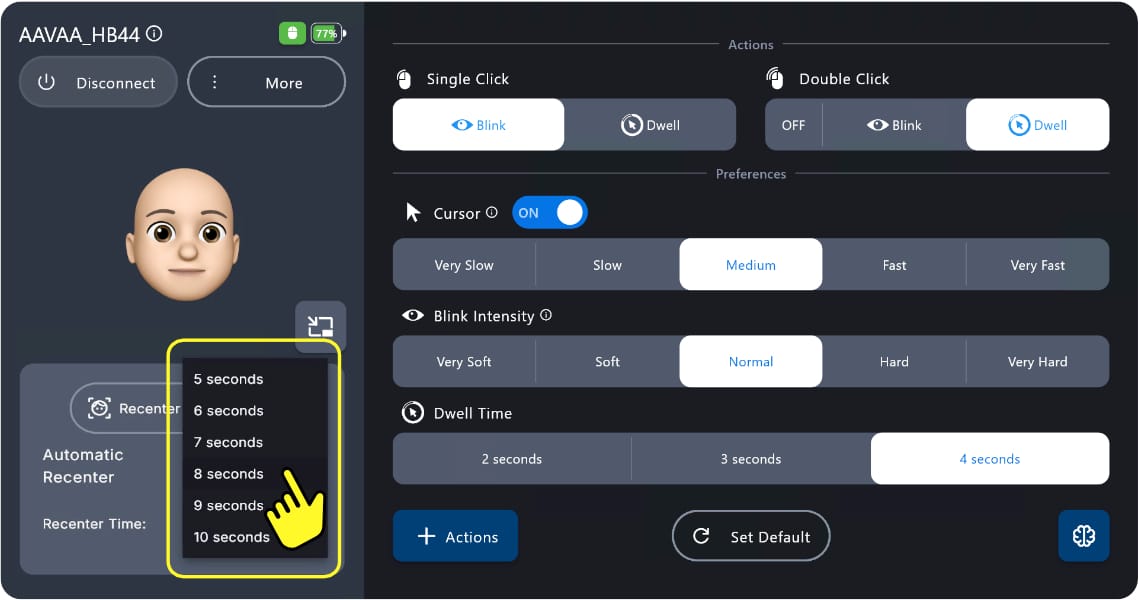
You can enable the automatic Recenter option. This option automatically recenters your cursor every 5 seconds without the need of a mouse.
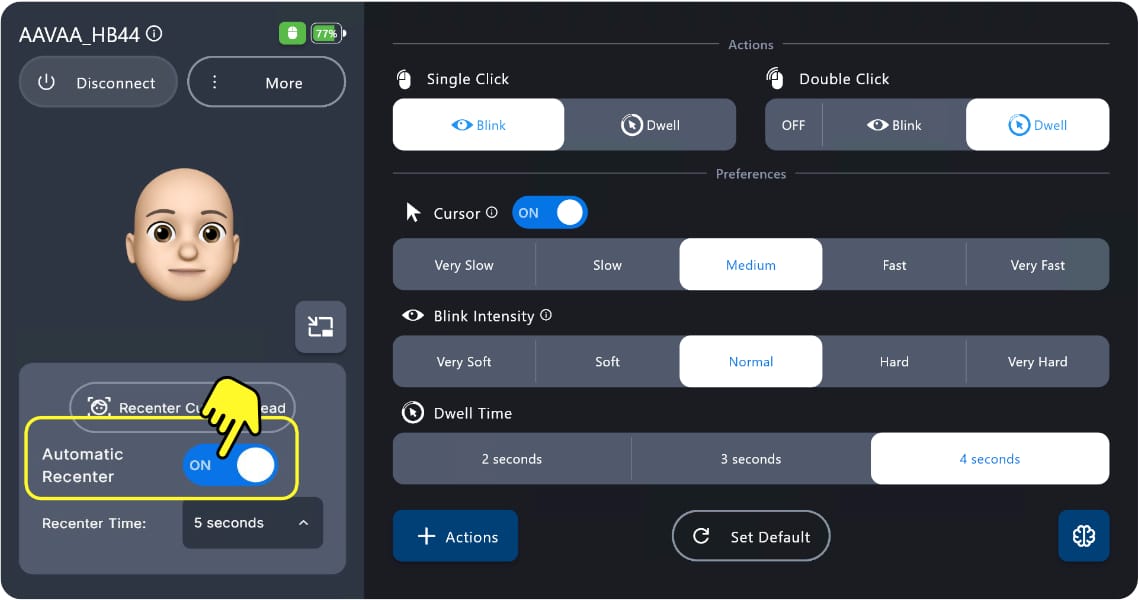
You can adjust the amount of seconds it takes for the cursor to be recentered automatically.
Mini-Bar
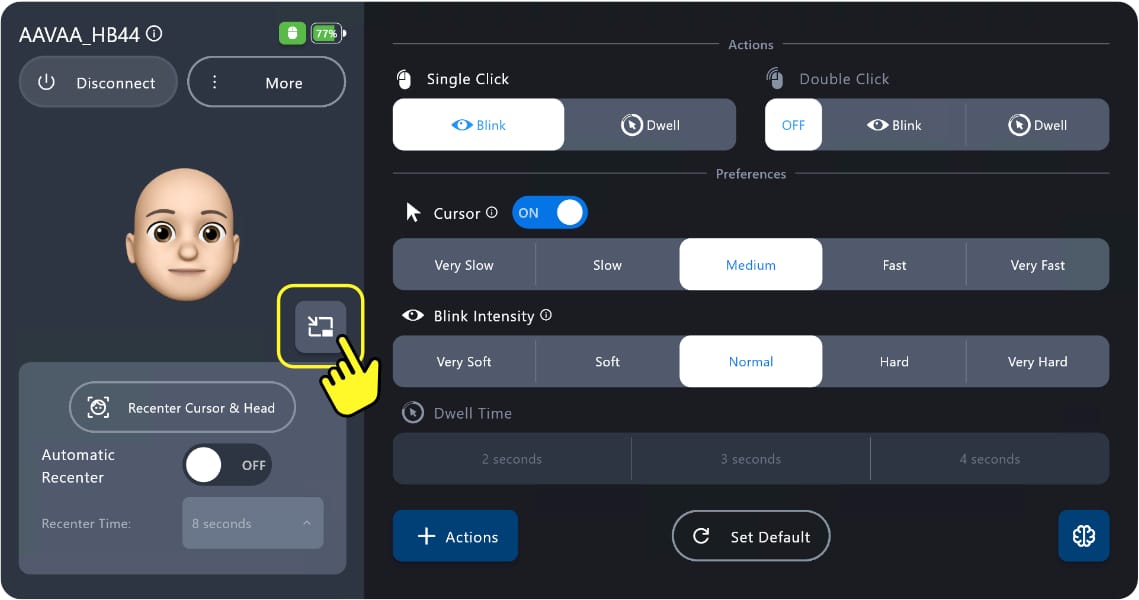
With the Mini-Bar you can see your blink and head triggers in real time as you navigate your computer.

Click on the minimize button to open up the Mini-Bar.
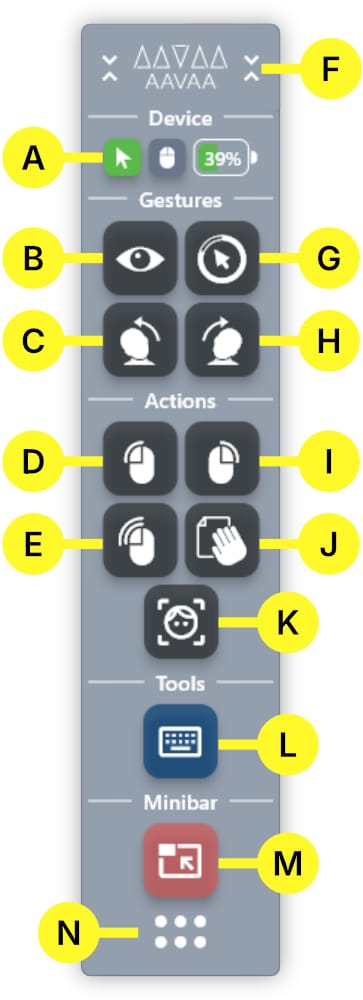
The Mini-Bar Icons let you know which functions are active while you navigate your computer.
a) Cursor control
b) Blinks
c) Tilt head left
d) Left click
e) Double click
f) Minimize the Mini-Bar
g) Dwell click
h) Tilt head right
i) Right click
j) Drag & Drop
k) Auto-Recenter Cursor
l) Click to open the AAC Keyboard.
m) Click to close the Mini-Bar.
n) Drag to Move the Mini-bar.
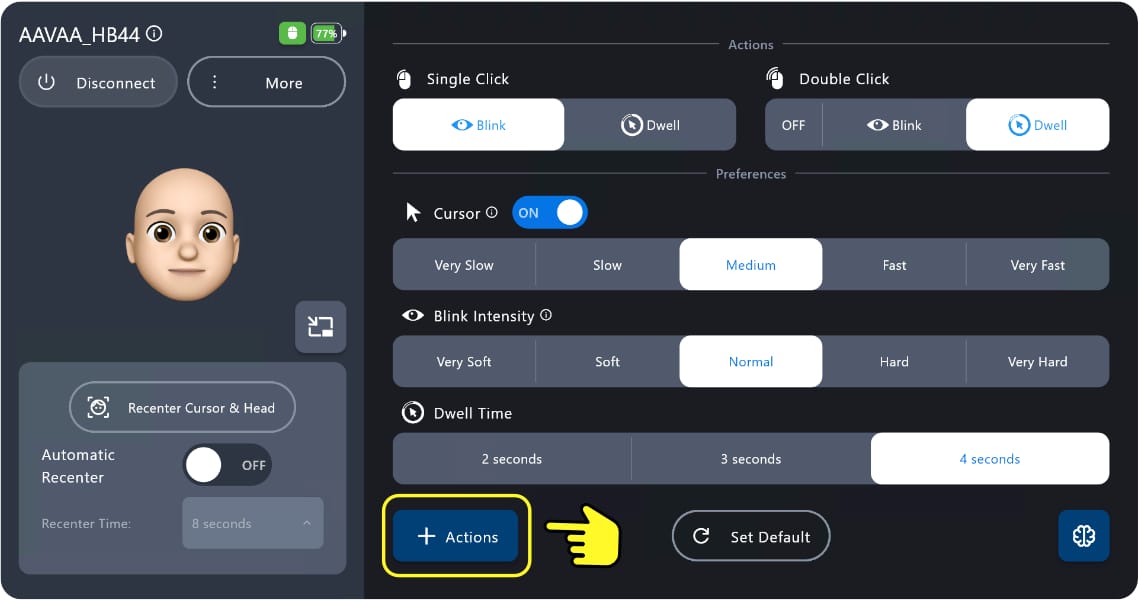
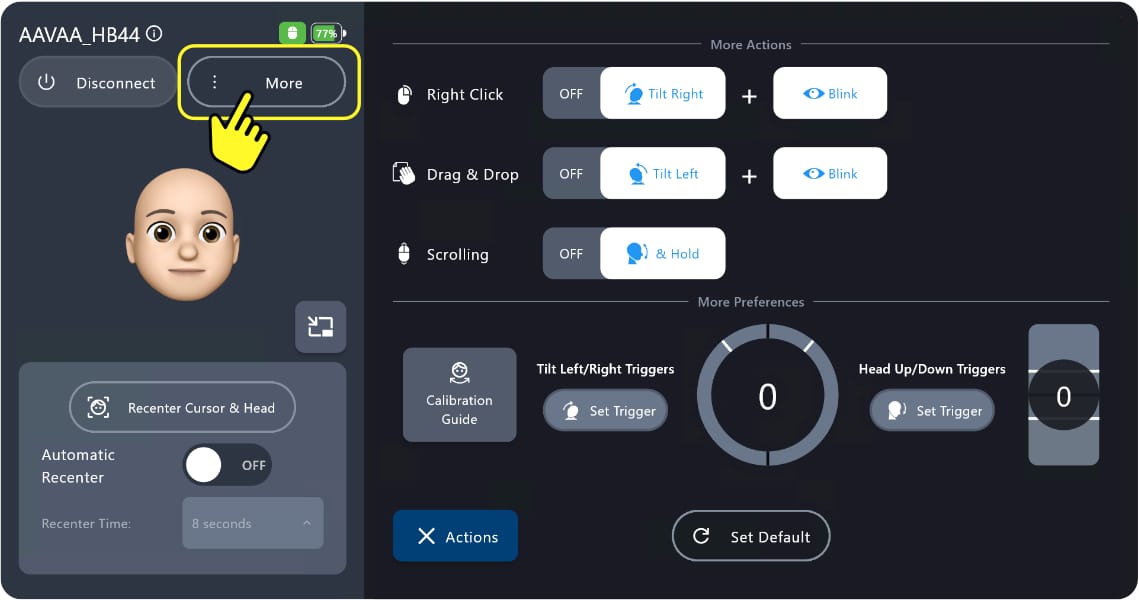
+ Actions
Click on the + Actions icon to open up our newest features and fine-tune your experience. Here you can activate our newest features such as Right Click, Drag-and-Drop or Scrolling.
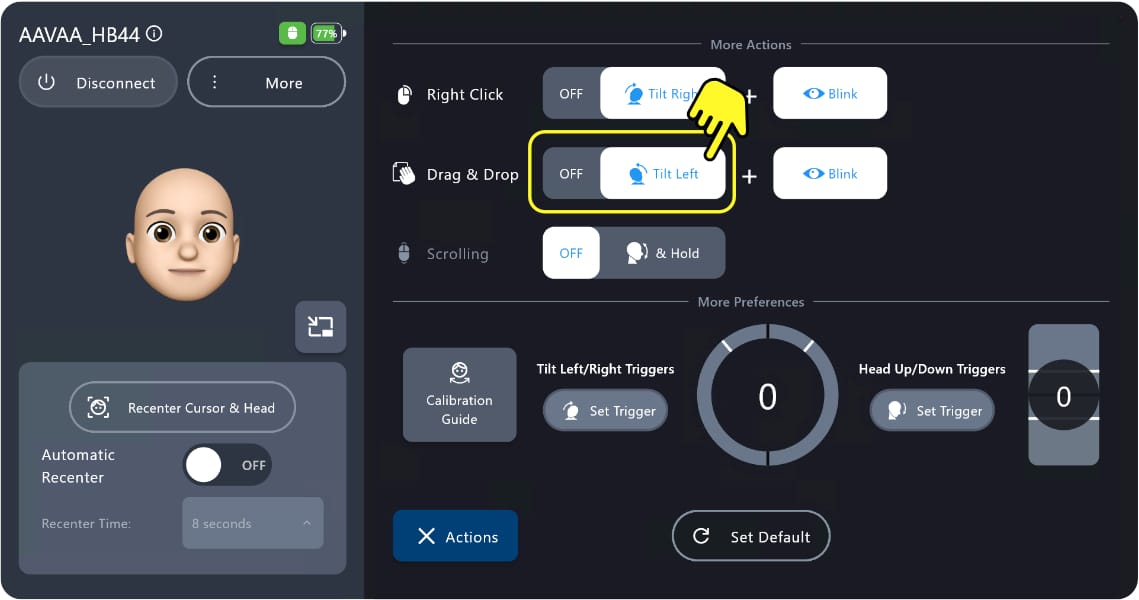
Right Click
To enable Right Click select the Right Click + Blink option. This feature will enable you to Right Click by tilting your head to the right and then blinking.

To correctly Right Click you need to blink while your head is tilted to the right. Once you Right Click you can position your head forward again.
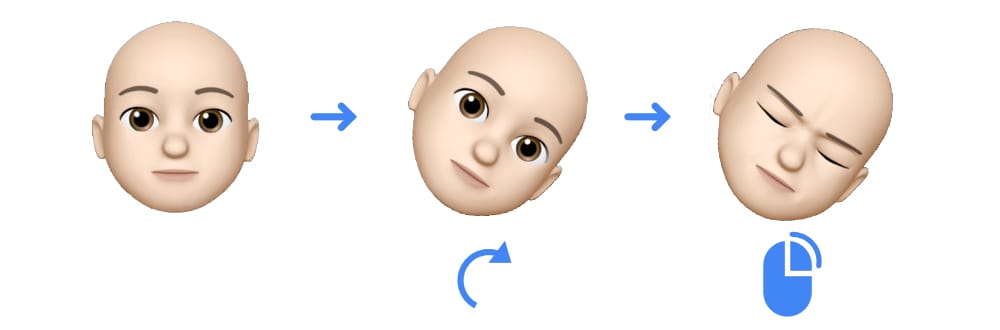
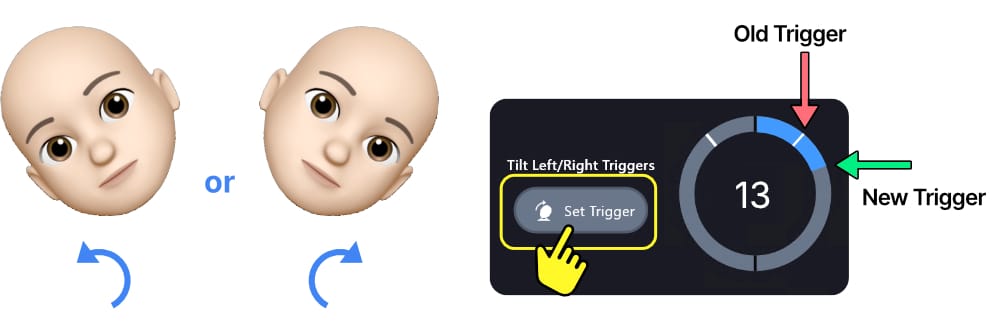
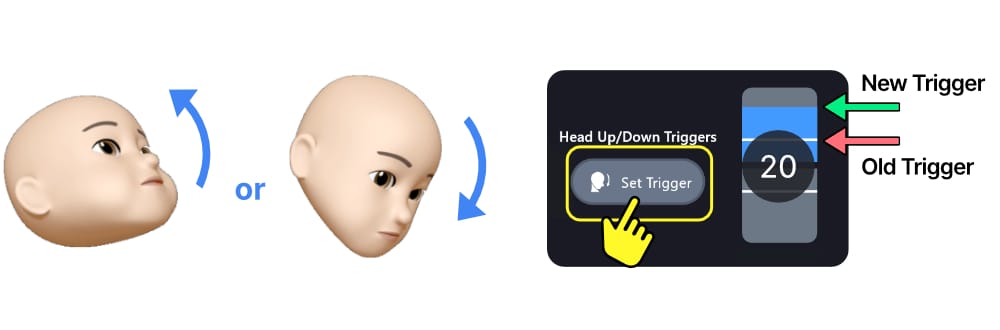
To adjust the angle of your head tilt, you can see the current angle represented as a white bar in the tilt circle icon.
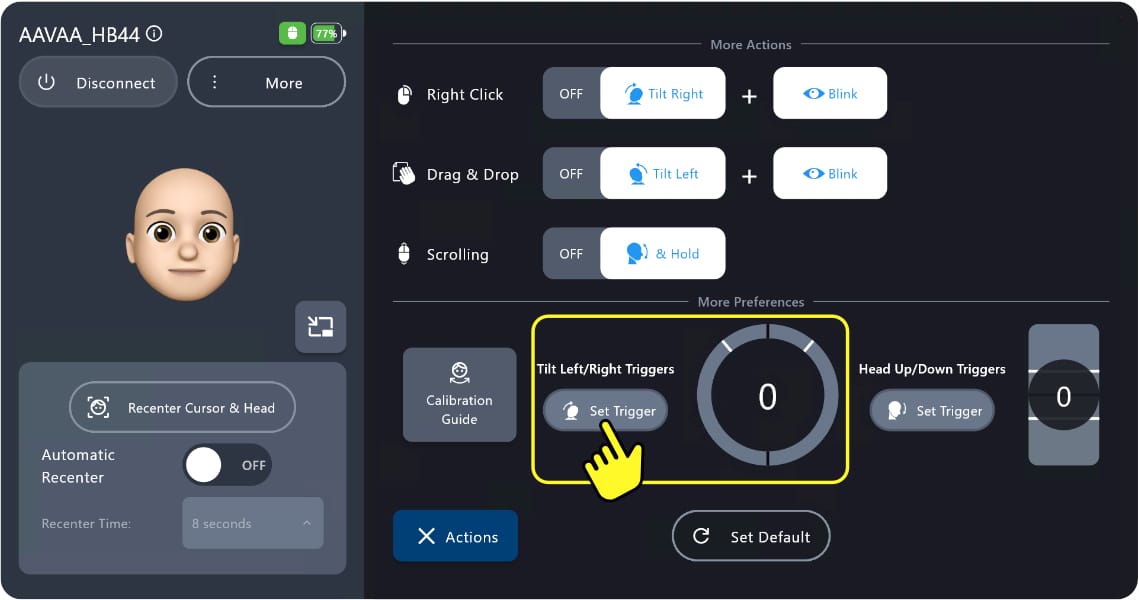
The circle will always indicate the angle of your head. To change the angle, click on Set Trigger and the white bar will move to the current position.
Drag & Drop
To enable Drag & Drop select the Drag & Drop + Blink option. This feature will enable you to start dragging by tilting your head to the left and then blinking.
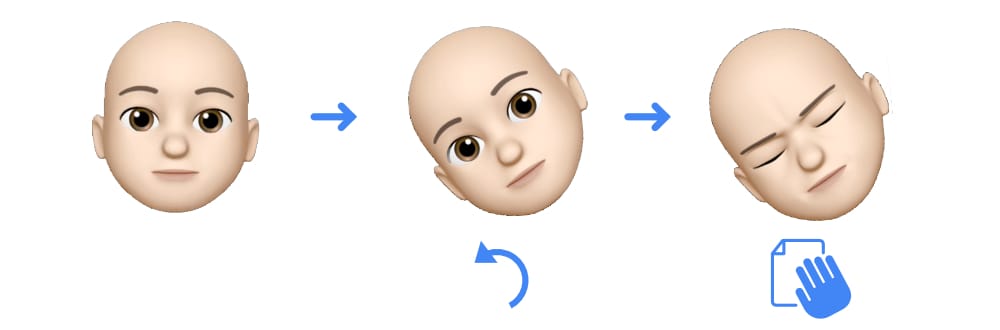
Drop the selected item by blilnking again.
To adjust the height of your head movements, you can set the current position of your head and click on Set Trigger. (See above)
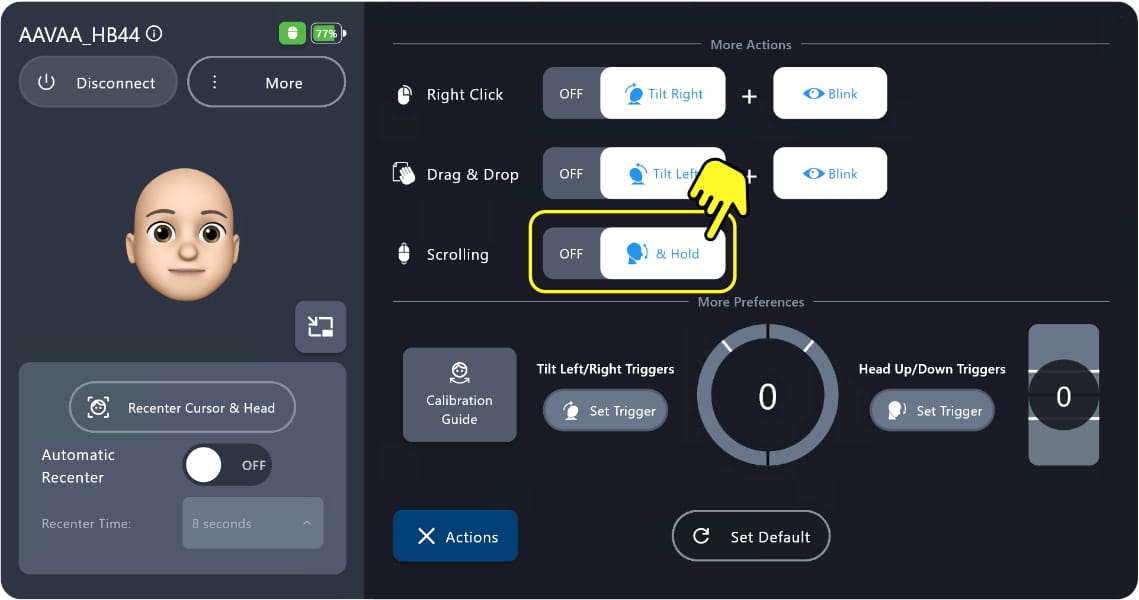
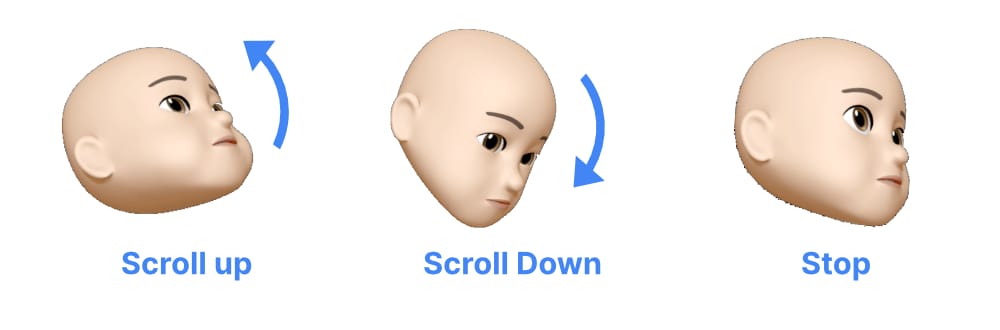
Scrolling
To enable Scrolling select the Up/Down & Hold option. This feature will enable you to scroll by moving your head up (to scroll up) or moving your head down (to scroll down.)
To adjust the height of your head movement, you can see the current height represented as a white bar in the Height Bar icon.
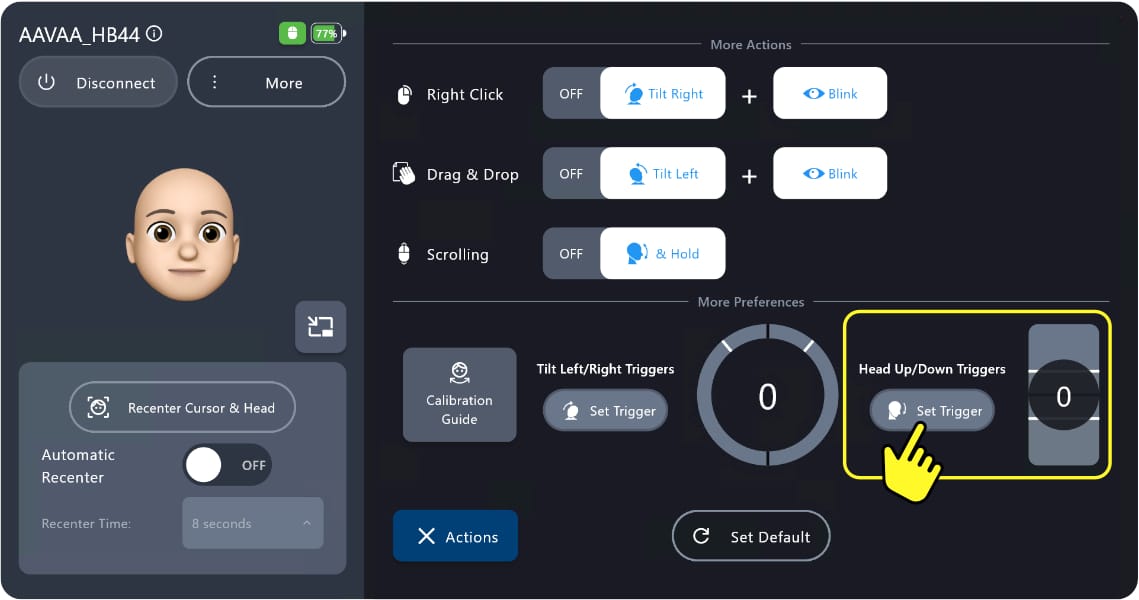
The bar will always indicate the height of your head. To change the height, click on Set Trigger and the white bar will move to the current position.
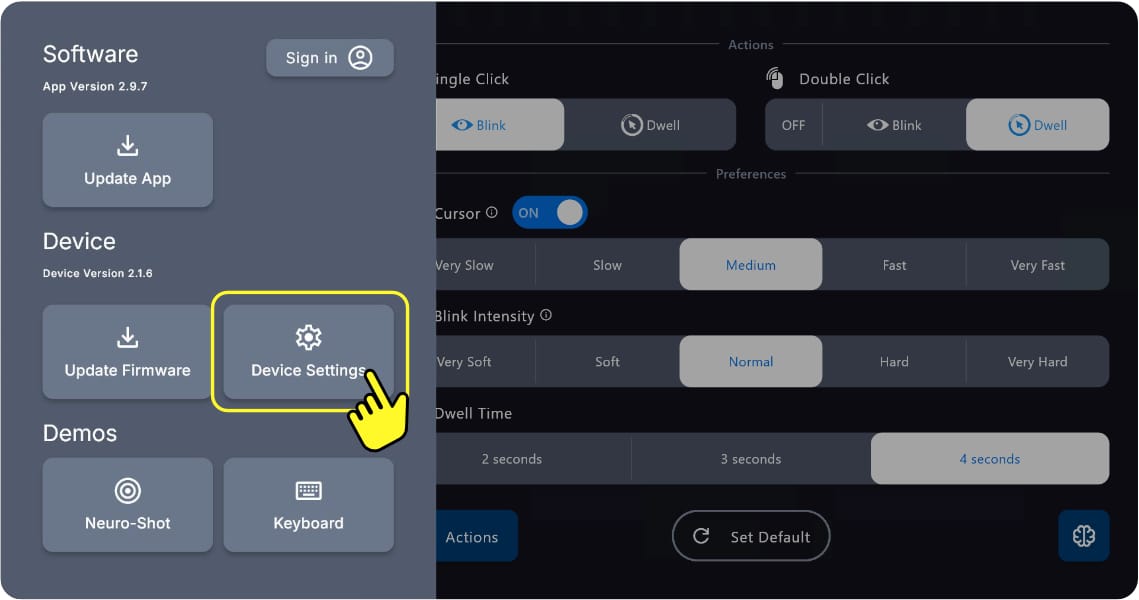
More Settings
In the More settings, you can update the app and your device, calibrate head movements, and test your setup at any time.
Update App
Click on the Update App button to start the update. The app will begin to download the latest version of the software and install it automatically.
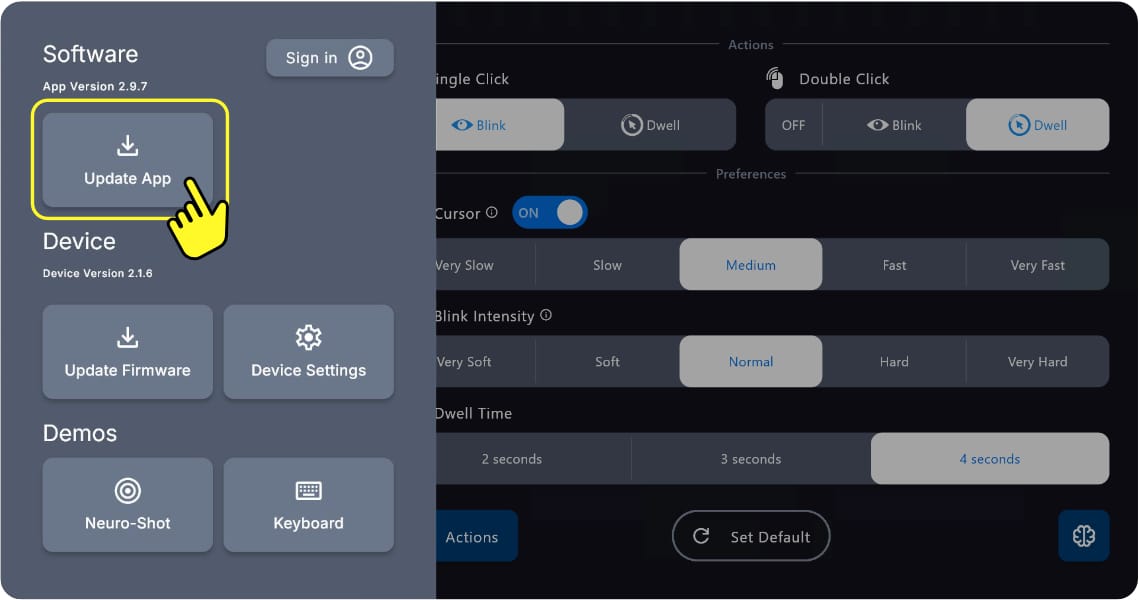
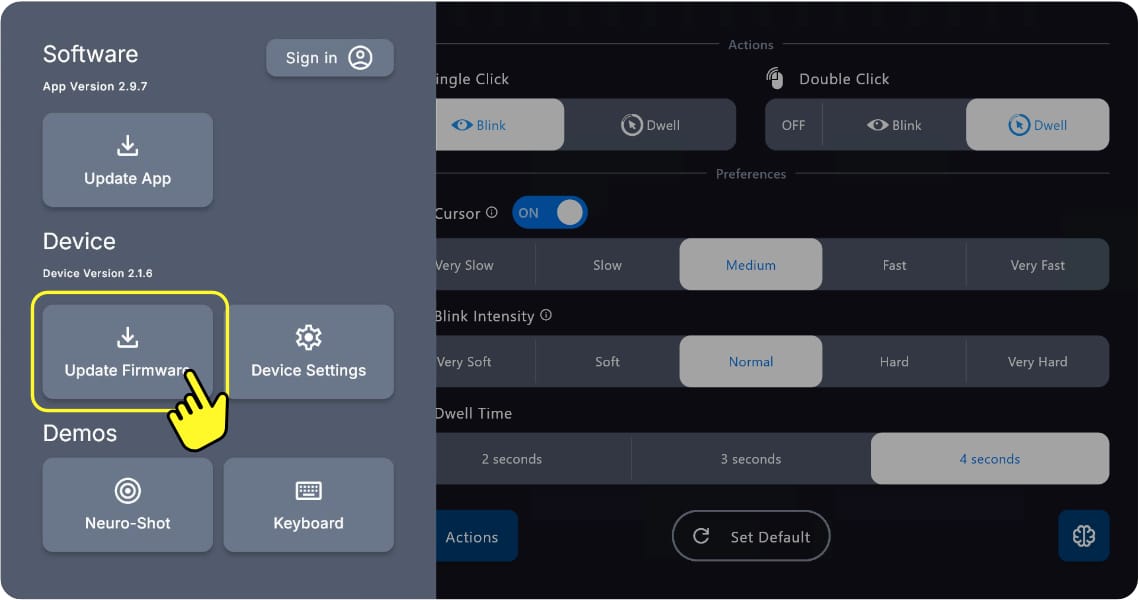
Update Firmware
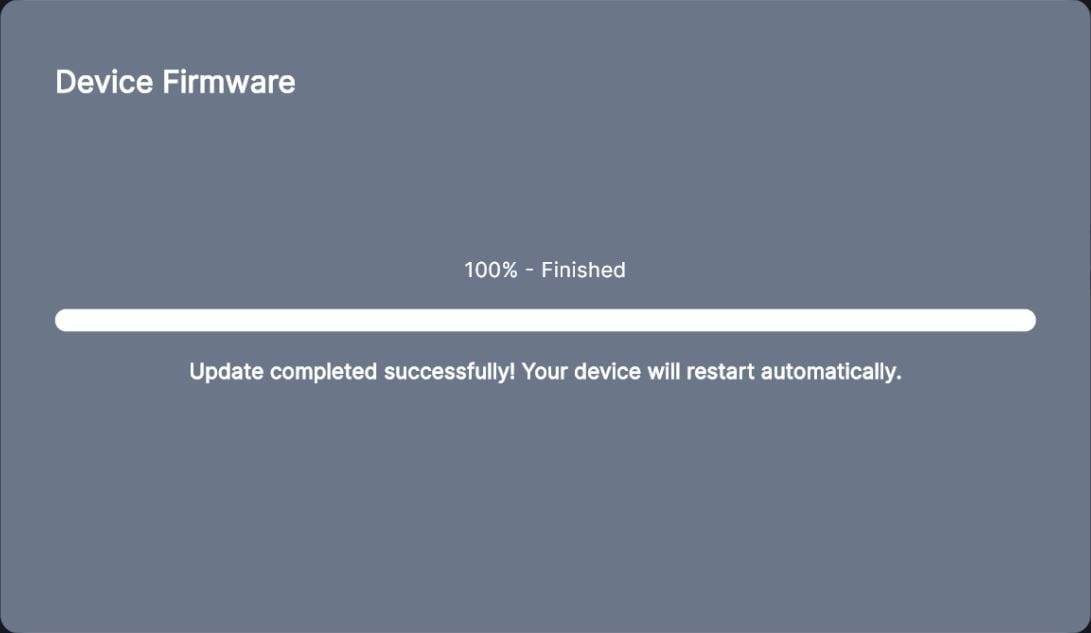
If there is a new firmware available, a pop-up window will appear with the option to install the firmware. Clicking on the update icon will begin to download and install the update automatically.
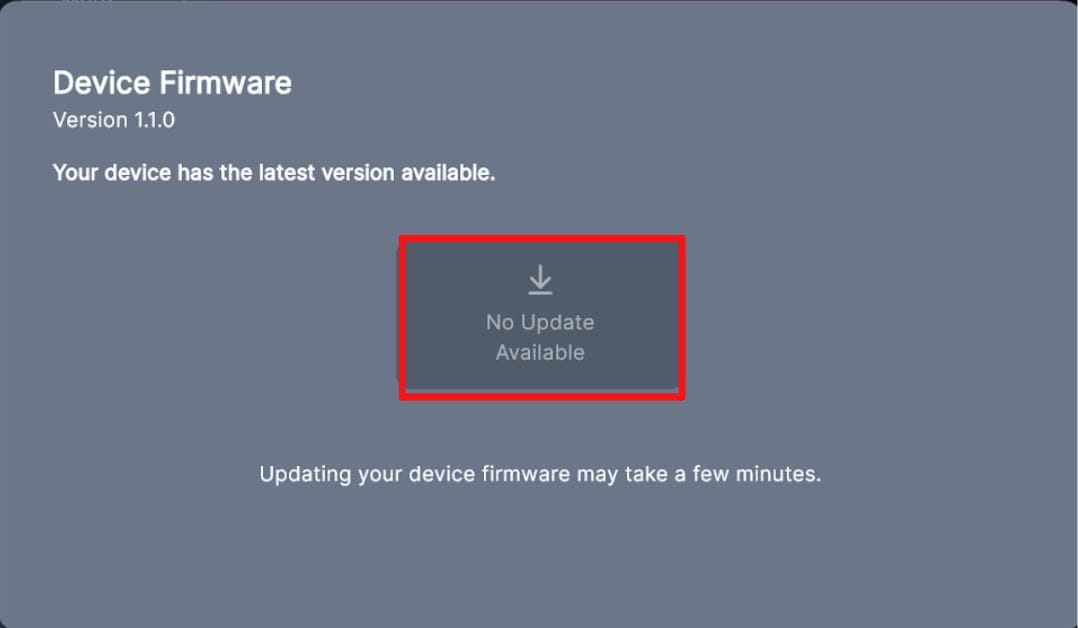
Once the firmware is updated, the user will see the following message on the screen. The device will restart itself and will be available to connect after 1-2 minutes.
Click on the Update Firmware button to manually update your device’s firmware. The app will begin to download the latest version of the firmware and install it on your device.
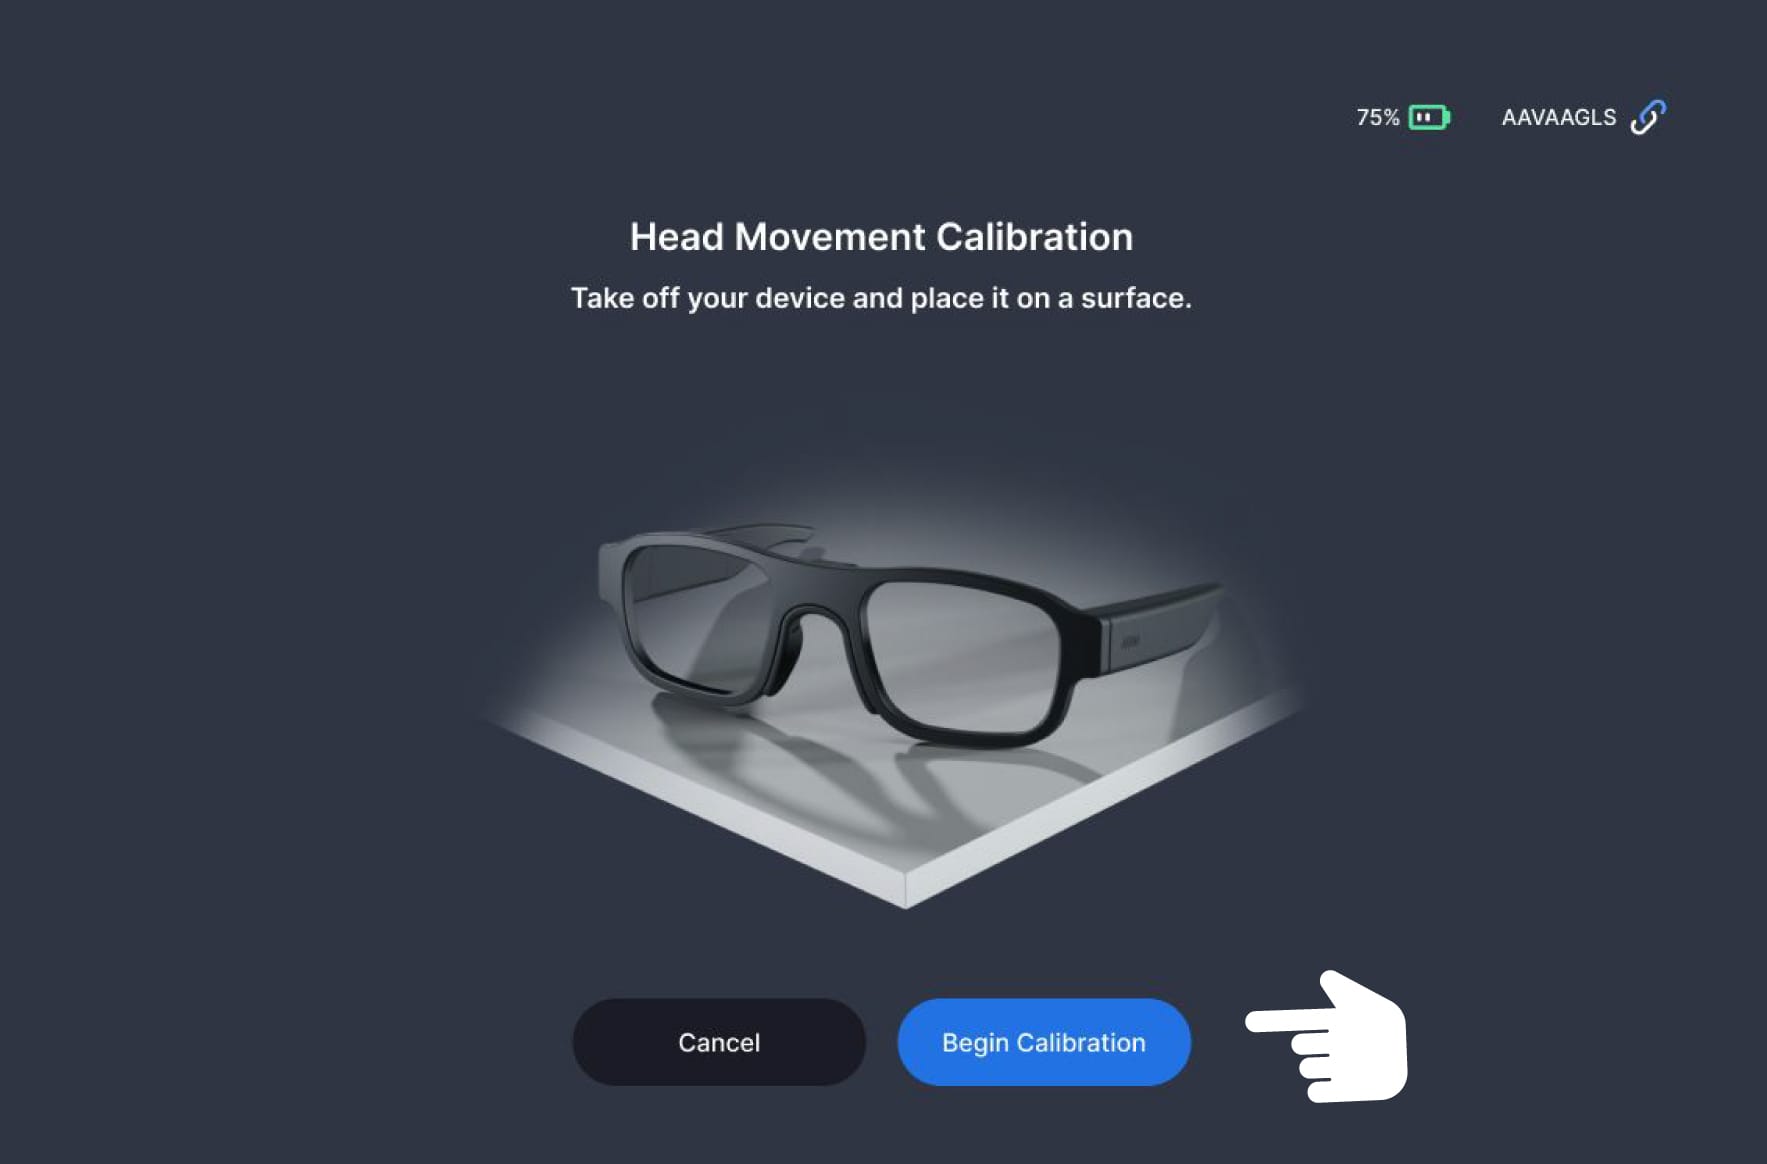
Head Tracking Calibration
Head to your Device Settings to open up the Head Tracking Calibration Window.
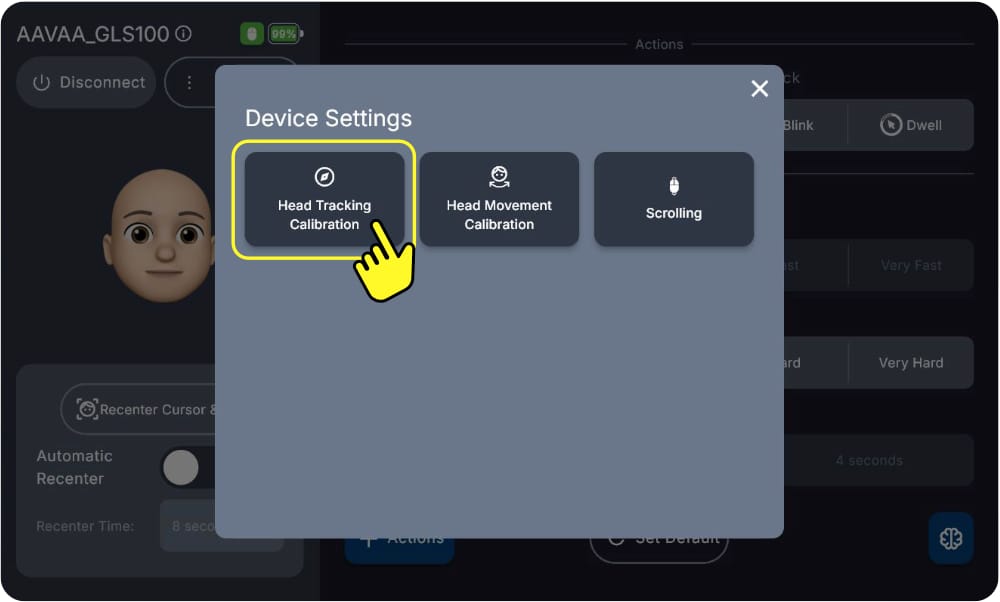
Once inside the calibration setting simply lay your device on a flat surface, as indicated by the Mini-GUI, and click on the “Begin Calibration” button.
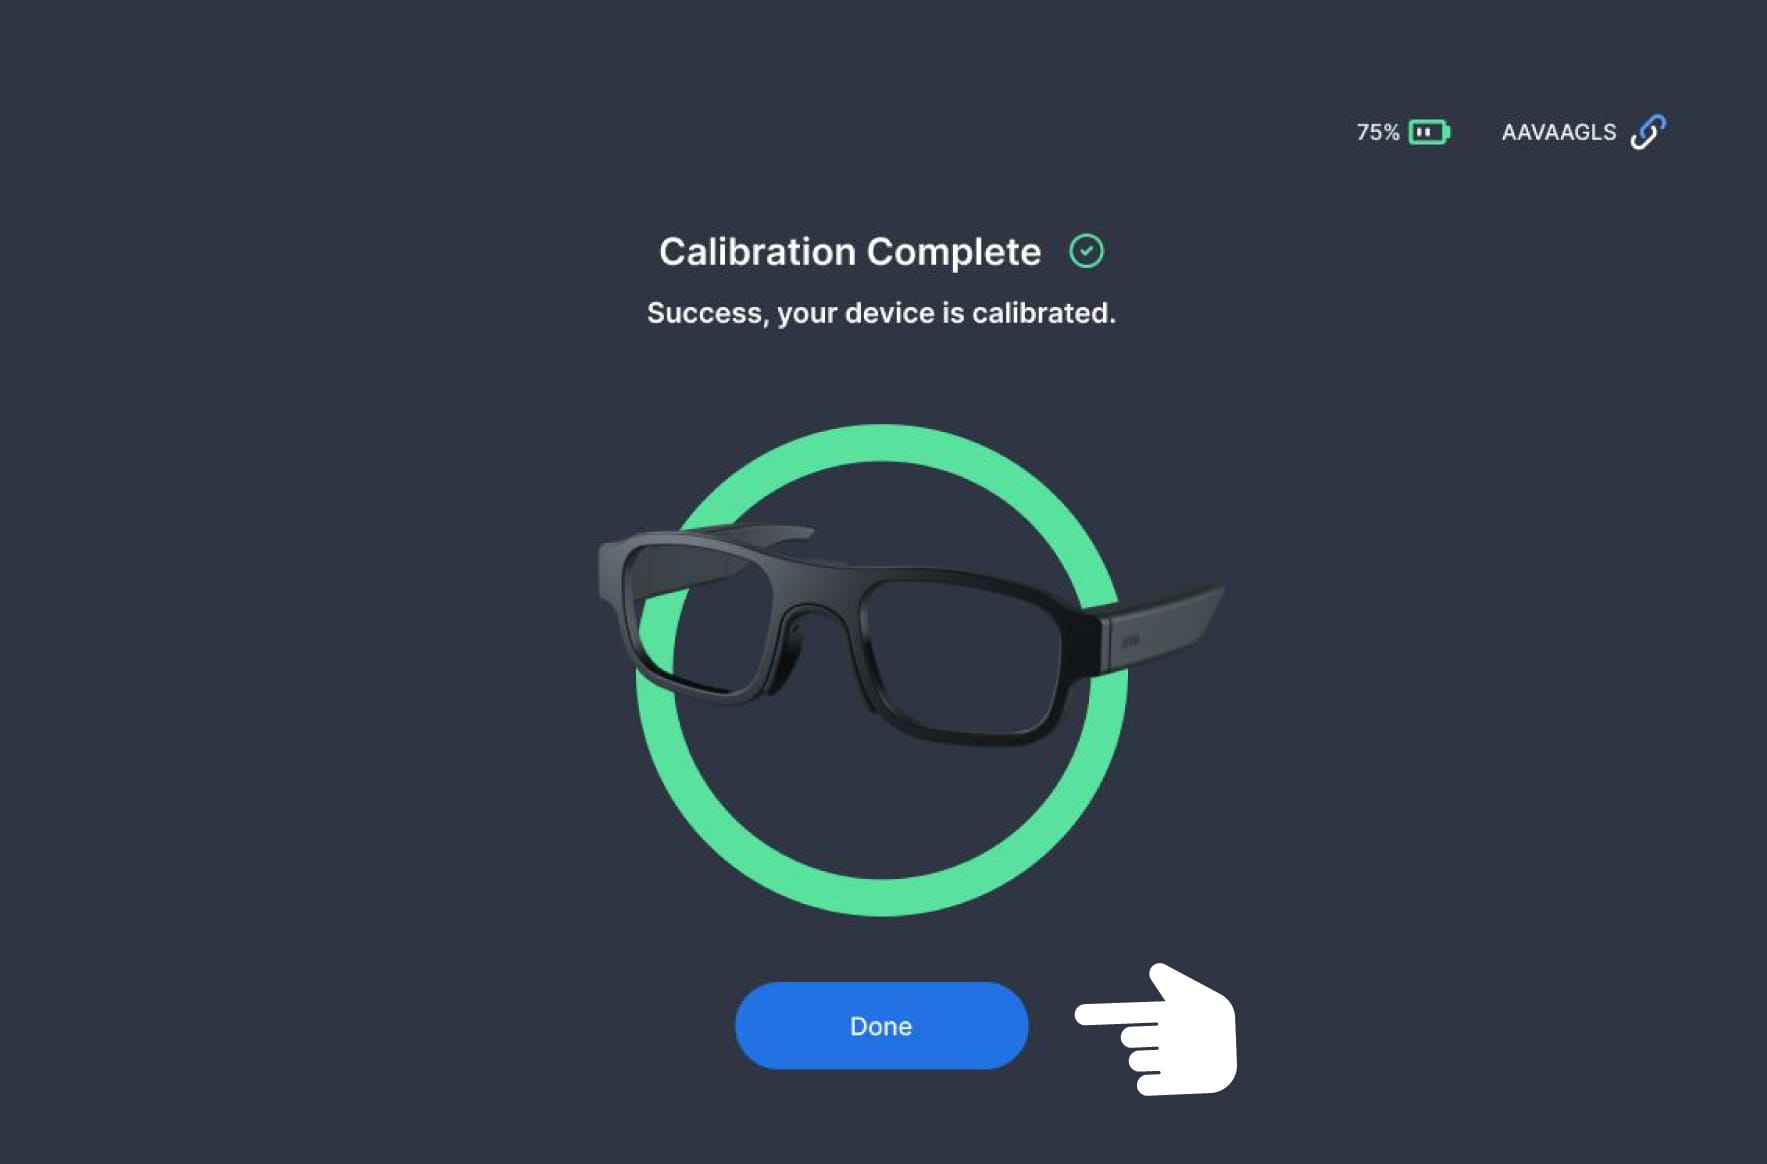
You will be notified if any errors occurred during the calibration. When the calibration is complete you will be able to return to the dashboard by clicking “Done.”
Disconnect Your Device
Disconnect your AAVAA device with the “Disconnect” button.